
Text Editor
The Text Editor toolbar provides various formatting and content editing tools that allow you to create and customize content with ease. Here is a detailed breakdown of what each button does:
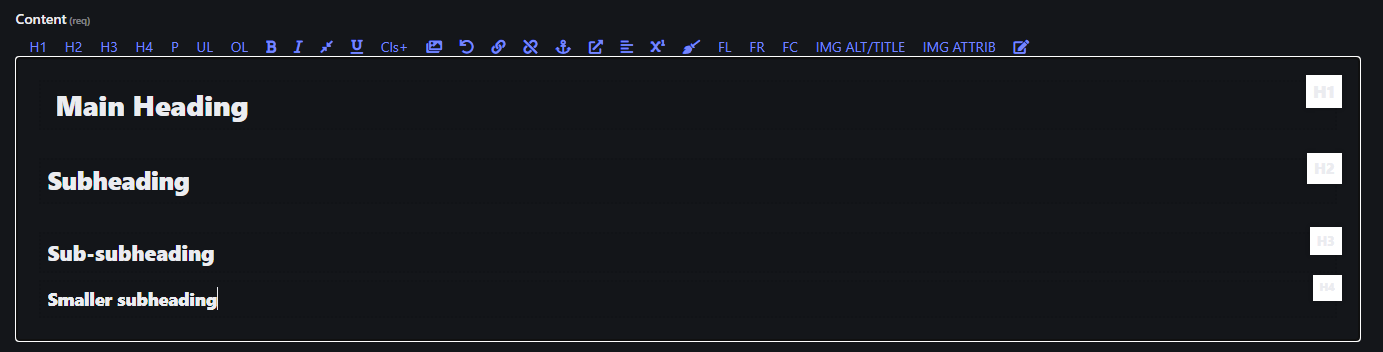
1. Header Styles (H1, H2, H3, H4)
- Use these buttons to format selected text as different levels of headings.
- H1: Main heading (largest).
- H2: Subheading.
- H3: Sub-subheading.
- H4: Smaller subheading.
2. Paragraph (P)
- Converts the selected text into a regular paragraph. This is useful if you've applied a heading or other format that you want to revert back to standard paragraph formatting.

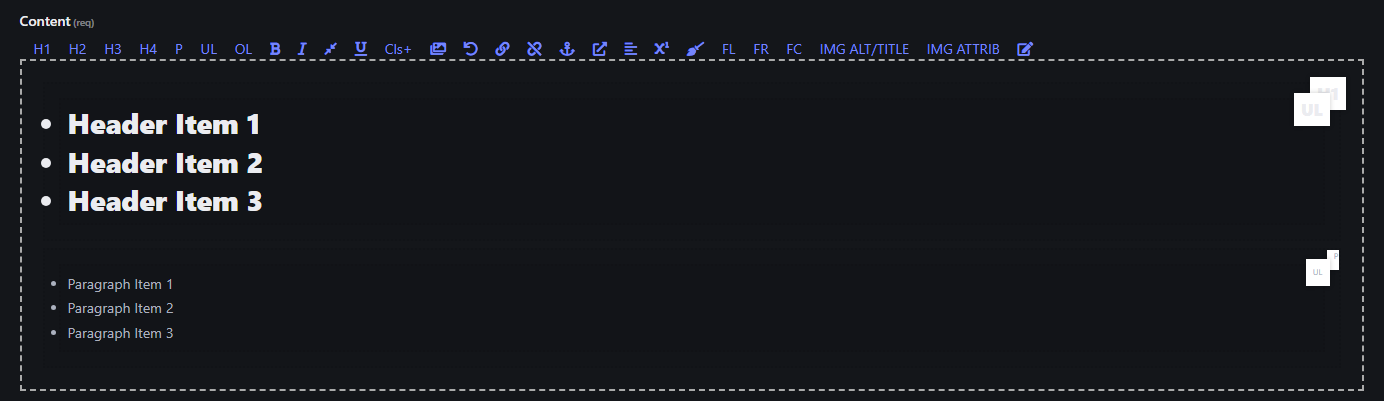
3. Unordered List (UL)
- Creates a bullet-point list from the selected text. Headers and paragraphs can contain Unordered Lists.
4. Ordered List (OL)
- Creates a numbered list from the selected text. Headers and paragraphs can contain Ordered Lists.

5. Bold ()
- Makes the selected text bold to emphasize it.

6. Italic ()
- Makes the selected text italicized for emphasis or distinction.

7. Small
- Makes the selected text small.

8. Underline ()
- Underlines the selected text.

9. Add Class (Cls+)
- Adds a custom CSS class to the selected HTML element. This is useful for applying specific styling or custom formatting via CSS.
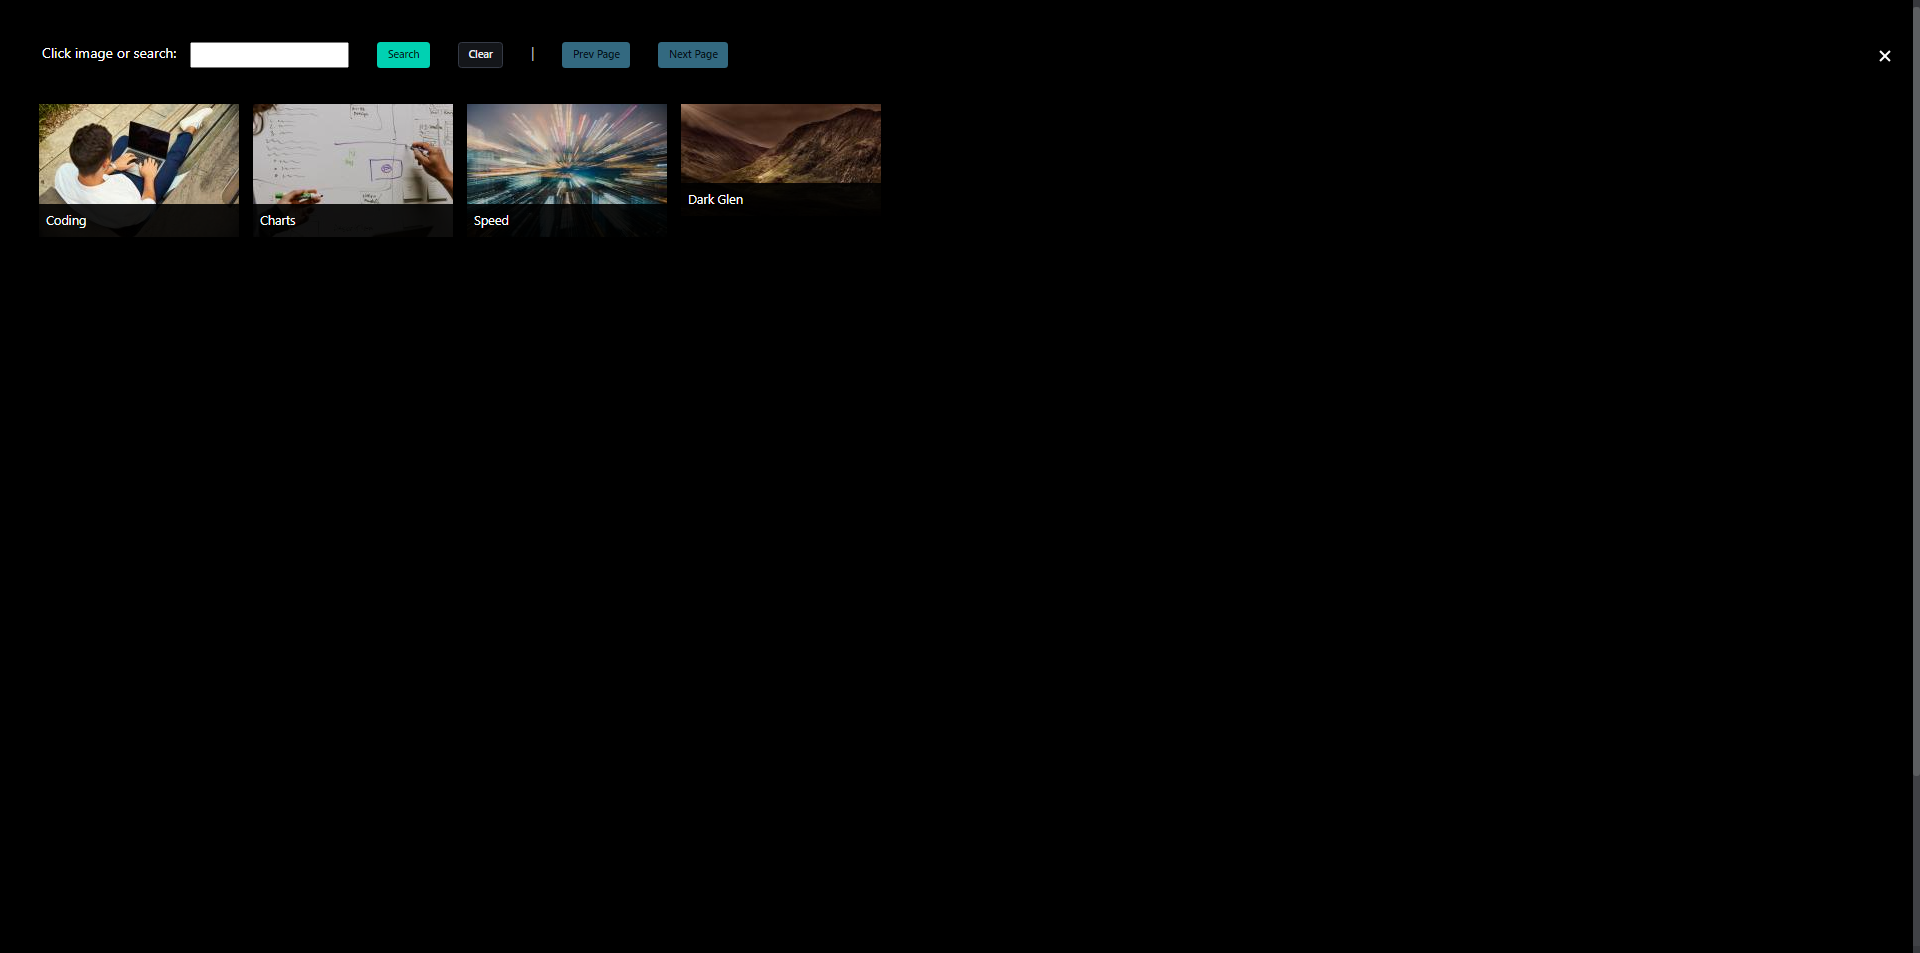
10. Image ()
- Select an image from uploaded images.
- To add a new image, see (Uploading an Image)

11. Undo ()
- Reverts the last change you made.
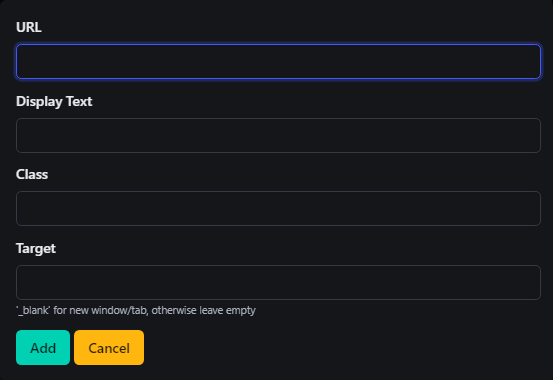
12. Create Link ()
When you click the Create Link () button in the toolbar, a dialog box will open with several options for configuring the hyperlink. Here’s an explanation of each option:
-
URL
- This is the address of the webpage you want to link to.
- Enter the full URL (including
http://orhttps://) of the destination page. - Example:
https://www.example.com
-
Display Text
- This is the text that will be visible to users, which they can click on to follow the link.
- If left blank, the URL itself will be displayed as the clickable text.
- Example: Enter "Click Here" if you want this text to appear instead of the full URL.
-
Class
- This field allows you to apply a CSS class to the hyperlink for custom styling.
- If your site has specific CSS classes for styling links, you can add the class name here to apply those styles.
- Example: Enter
button-linkto style the link as a button if your CSS has such a class.
-
Target
- This defines where the link will open when clicked.
- Leave blank to open the link in the same tab/window.
- Enter
_blankto open the link in a new tab or window.
- This is useful if you want to keep users on your site while directing them to external resources.
- This defines where the link will open when clicked.
-
Add: Click this button to insert the link with the provided configurations into your content.
-
Cancel: Click this button to discard the link and close the dialog without making any changes.
13. Delete Link ()
- To remove a hyperlink, simply select the linked text and click the Delete Link button (🔗 with an X) in the toolbar.
14. Anchor ()
- Inserts an anchor at the cursor position, which can be used to create internal links that jump to specific parts of a page.
15. Toggle External Link ()
- Converts the selected text into a hyperlink. Clicking this button opens a dialog to enter the URL.
16. Justify Left ()
- Aligns the selected text to the left margin, which is useful for creating a uniform and clean appearance for paragraphs and blocks of text.
17. Super Script ()
- Raises the selected text slightly above the baseline, often used for mathematical expressions (like exponents) or footnote markers. This is an example of superscript text.
18. Remove Formatting ()
- Removes all applied formatting (e.g., bold, italic, underline, font size, etc.) from the selected text, returning it to the default style.
19. Float Left (FL)
- Floats the selected element (e.g., an image or a block of content) to the left of the page, allowing text to wrap around it on the right.
20. Float Right (FR)
- Floats the selected element (e.g., an image or a block of content) to the right of the page, allowing text to wrap around it on the left.
21. Clear Float (FC)
- Clears any floating applied to elements on the left or right, ensuring that the next block element starts below the floating element rather than wrapping around it. This is helpful for maintaining proper layout structure.
22. Image Attributes (IMG ALT/TITLE)
-
This option allows you to add or edit the "alt text" and "title" attributes for an image.
- Alt Text: A description of the image for accessibility purposes (used by screen readers for visually impaired users) and for search engine optimization (SEO). This is displayed if the image fails to load.
- Title: A brief tooltip that appears when users hover over the image.
First, select the image you want to edit, then click
IMG ALT/TITLEto modify these attributes.

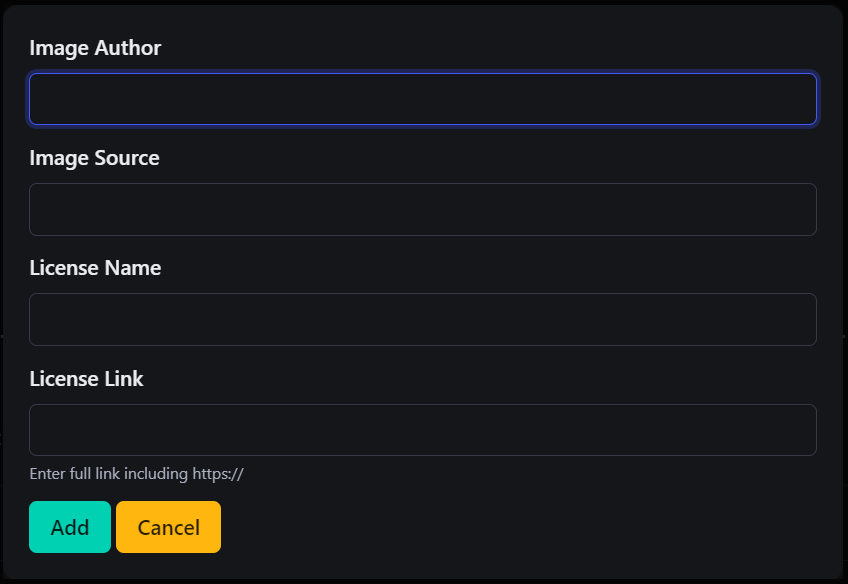
23. Image Author (IMG ATTRIB)
-
This option allows you to provide attribution information for an image, which is especially important if the image is sourced from a third-party platform that requires credit.
- Image Author: Enter the name of the person or entity that owns the image.
- Image Source: Specify where the image originated (e.g., a URL or platform).
- License Name: Indicate the type of license under which the image is used (e.g., Creative Commons).
- License Link: Provide a URL to the license terms, if available. Enter the full link including
https://
First, select the image you want to edit, then click
IMG ATTRIBto modify these attributes.
24. Code View ()
- Displays the HTML code version of your content, displaying the underlying structure with HTML tags and formatting. This allows you to make direct changes to the HTML for more precise control over the content layout and styling.
- It’s especially useful for developers who want to fine-tune the markup or troubleshoot formatting issues that can't be easily resolved in the visual editor.