Creating a New Page
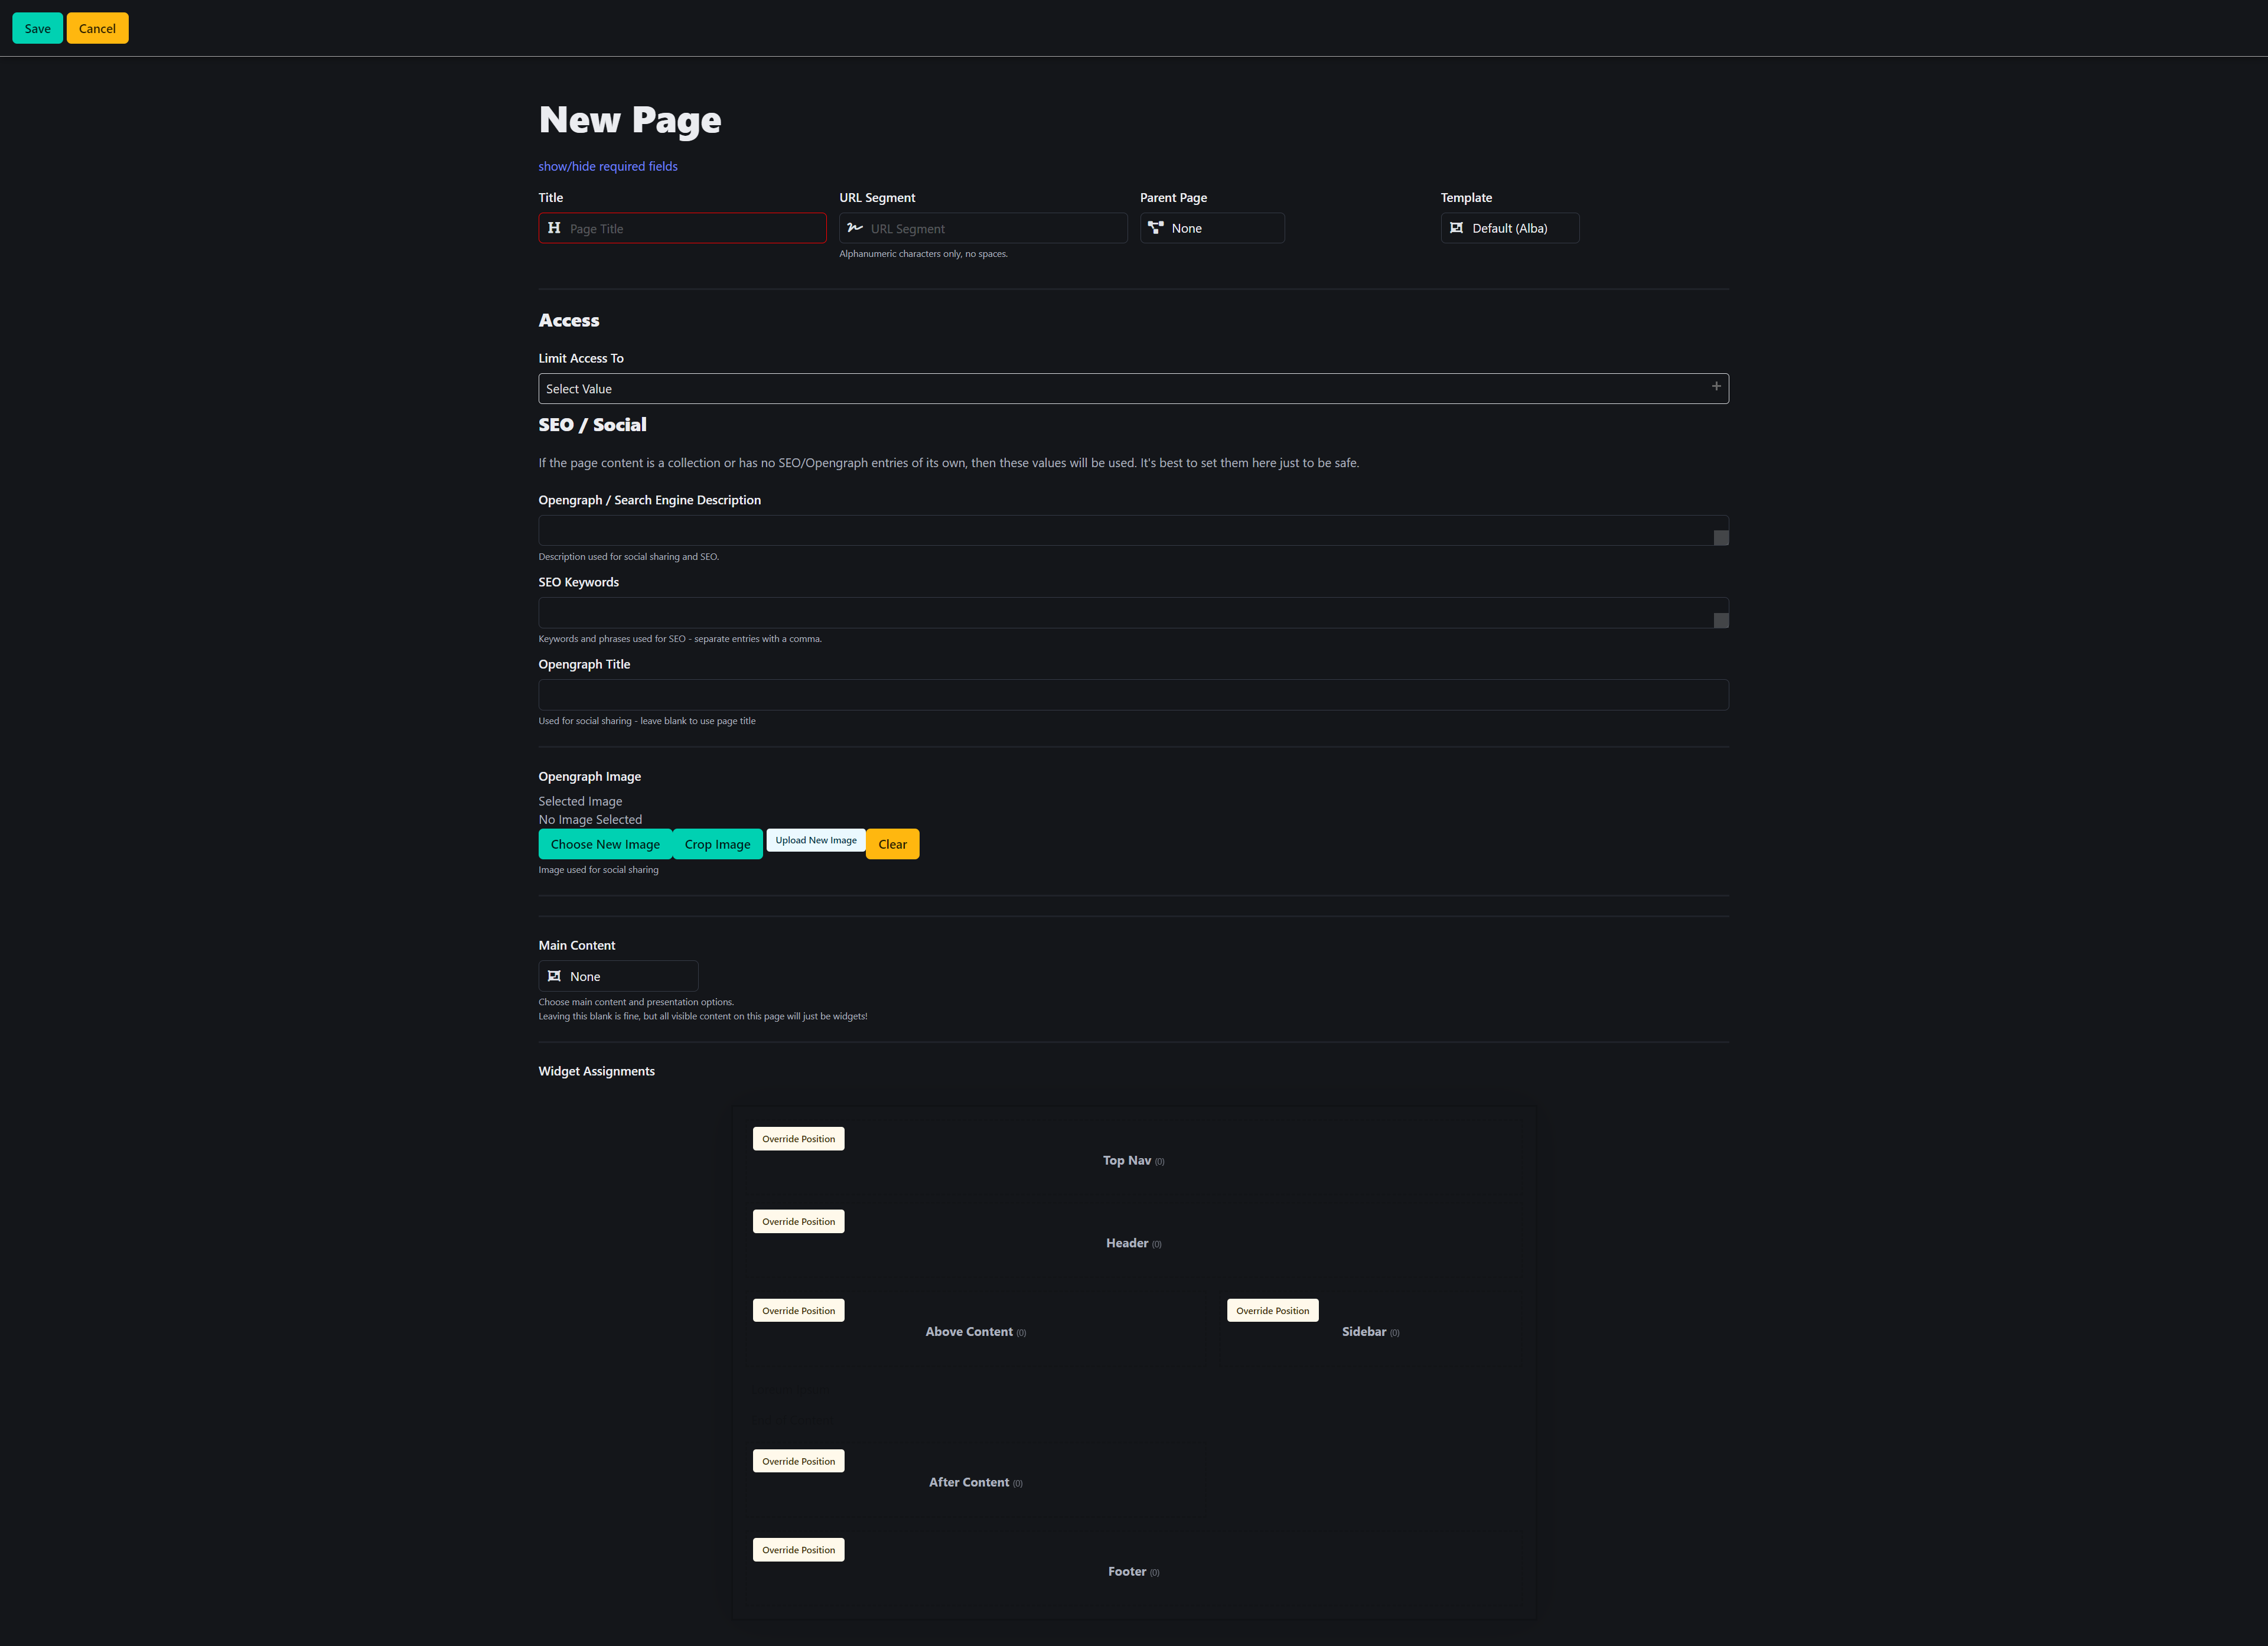
1. Select Pages from the menu. Navigate to the New Page interface. 
You will see a form with multiple fields and options for creating or editing a page.
2. Fill in the Page Details: 
2.1 Title
- Enter the title for your new page. This title will be displayed as the page heading.
2.2 URL Segment
- Enter a URL-friendly version of the page title. This can contain only letters, numbers, and hyphens. Leave blank to auto-populate based on the title.
2.3 Parent Page
- Select a parent page if this new page is a sub-page.
2.4 Template
- Choose a template for the page. The default template is usually selected but can be changed based on the design requirements.
3. Access Settings:
3.1 Limit Access To
- Set any access restrictions for the page, if applicable.
4. SEO / Social Settings:
4.1 Opengraph / Search Engine Description
- Enter a description that will be used for social sharing and search engines.
4.2 SEO Keywords
- Add keywords that will be used for SEO. Use commas to separate individual keywords or phrases.
4.3 Opengraph Title
- Enter the title used when sharing the page on social media platforms.
4.4 Opengraph Image
- Select an image for social media sharing:
- Choose New Image: Upload a new image for sharing.
- Crop Image: Adjust the selected image.
- Upload from Image: Select an image from existing assets.
5. Main Content:
5.1 Main Content Selection
- Set the main content type for the page. Select None if the page will primarily be widgets and doesn't need a main content body.
6. Widget Assignments:
Assign widgets to various positions on the page. The available positions are:
- Top Nav
- Header
- Above Content
- Sidebar
- After Content
- Footer
To override the position of the widgets, click Override Position for each section.
7. Save or Cancel:
Once all the details are filled out, you can either:
- Save: Save the new page and publish it according to the settings.
- Cancel: Discard the changes and return to the previous screen.

