
Creating a New Tag
1. Navigate to the Tags section. 
2. Click New Tag to create new tag.
3. Enter tag information: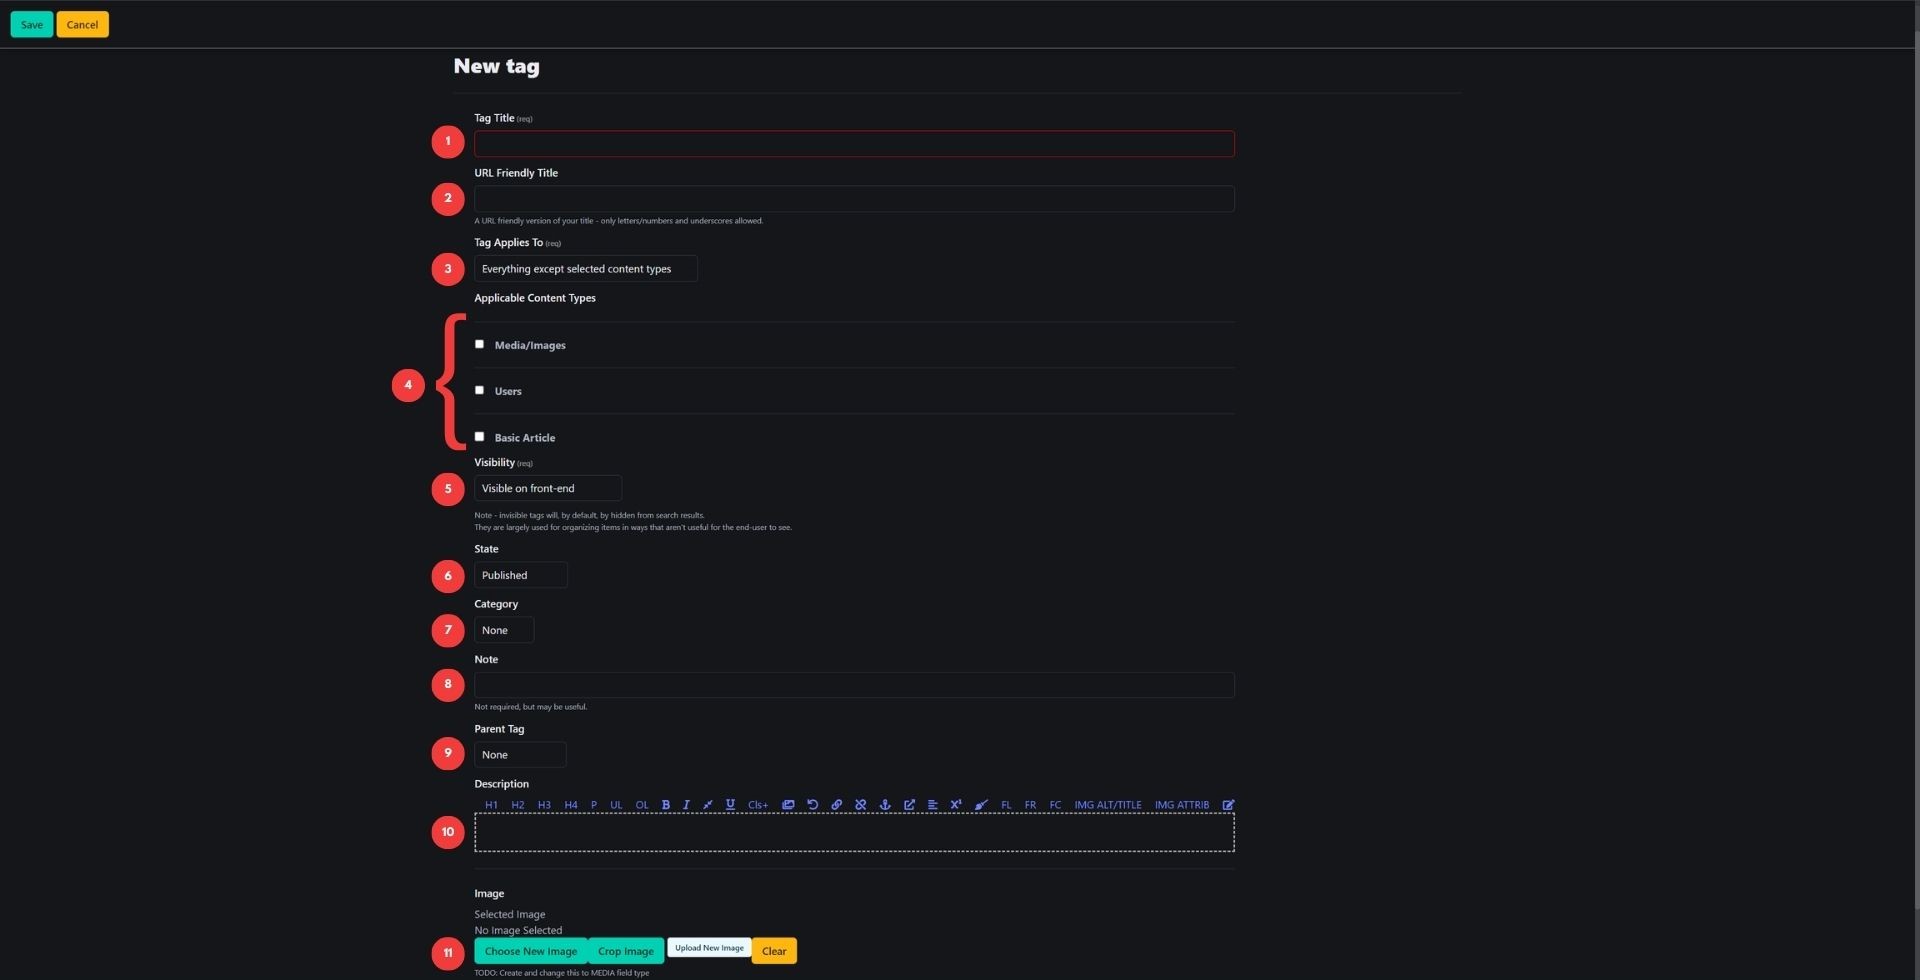
- Tag Title - Enter the title of the tag
- URL Friendly Title - A URL-friendly version of the tag title. Only letters/numbers, hyphens, and underscores allowed. Leave blank to auto-populate.
- Tag Applies To - Select which content types the tag applies to.
Only selected content types- The tag applies only to the content types chosen in the next step (option #4).Everything except selected content types- The tag applies to all content types except the ones chosen in the next step (option #4).
- Applicable Content Types - Select the content types based on the previous option (#3).
- Visibility - Choose whether the tag should be visible on the front-end or only on the back-end.
- State - Select whether the tag should be
Published(visible at selected locations) orUnpublished(hidden). - Category - Select a tag category. (See Creating A Category)
- Note - Add an optional note to provide additional information about the tag (visible only on the back-end).
- Parent Tag - Assign a parent tag, if applicable.
- Description - Provide a description for the tag.
- Image - Attach an image to the tag, if necessary. (See Uploading an Image).